Table of Contents
Open Table of Contents
Stack Frame: Function Call’s Home Base
In Part 1, we peeled off the “stack of plates” illusion and looked at how the stack really works through C and assembly.
Now, let’s take a look into the stack frame.
When you call a function, a stack frame is created. This frame:
- Stores the return address (so the CPU knows where to go back).
- Stores saved registers like rbp (the base pointer).
- Holds local variables.
- Might pass or receive arguments (depending on the Application Binary Interface - ABI).
Let’s re-use a similar C example:
int sum(int a, int b) {
    int result = a + b;
    return result;
}

int main() {
    return sum(10, 20);
}
Compile with:
gcc -fno-stack-protector -no-pie -o stack_test2 stack_test2.cNow disassemble:
objdump -M x86-64,intel -d stack_test2Look at the sum function and you’ll see something like this:
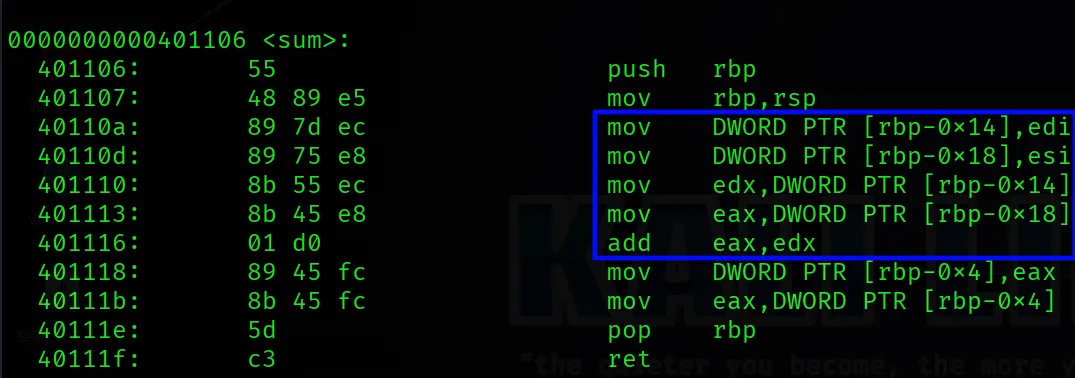
- Parameters (
a,b) are passed via registers (ediandesiare part of the System V AMD64 ABI). - A local variable result isn’t even explicitly saved. Instead,
eaxis used to return the result. - The stack frame is built and torn down manually by assembly logic.
Flags: CPU’s Mood Ring
Here’s the part most people skip but not us :)
The EFLAGS (or RFLAGS) register is the CPU’s way of tracking what just happened.
For example:
- ZF (Zero Flag) → Set if the result of an operation is zero.
- SF (Sign Flag) → Set if the result is negative.
- CF (Carry Flag) → Set on unsigned overflow.
- OF (Overflow Flag) → Set on signed overflow.
cmp eax, ebx
je equal_labelcmpsubtractsebxfromeaxbut doesn’t store the result it only updates the flags.je(jump if equal) checks the ZF (Zero Flag). If set, it meanseax==ebx.
So the flow control doesn’t rely on “if (a == b)” at runtime. It depends on what flags were set in the CPU after the cmp.
Let’s Try It Live
Try this small C program:
#include <stdio.h>
void test_flags(int a,int b){
        if (a == b)
                printf("Equal :)");
        else
                printf("Not equal :(");
}
int main() {
        test_flags(5,5);
        return 0;
}
Compile and disassemble:
gcc -fno-stack-protector -no-pie -o stack_test3 stack_test3.cobjdump -M x86-64,intel -d stack_test3In test_flags, you’ll find something like:
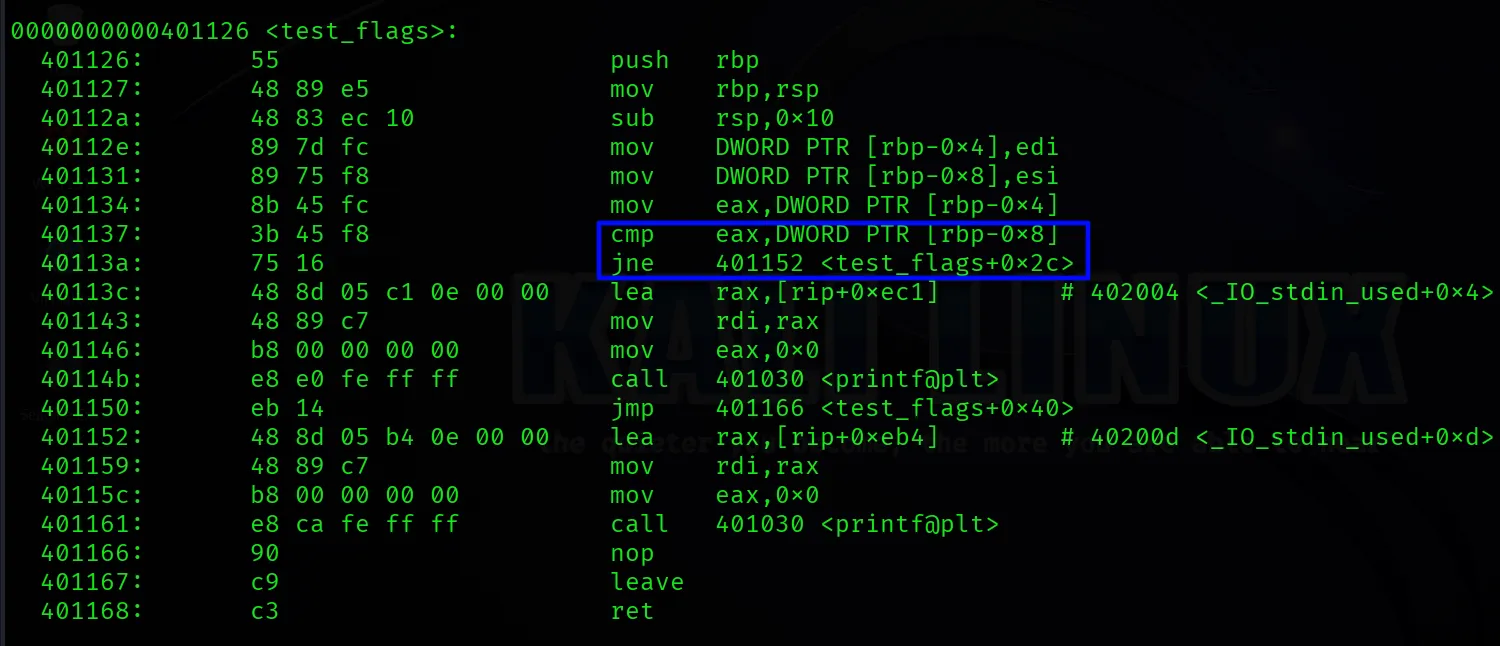
You are now witnessing the CPU checking flags, instead of doing a “C-style” condition. These tiny flag bits control massive branches of logic. Isn’t it amazing?
From Code to CPU State
Here’s the key mindset shift.
High-level code is about what you want. Assembly is about how it’s done. Plus, the stack and flags are the battlefield where your logic actually plays out. It’s like you’re orchestrating memory, CPU mood, and instruction flow.
Now it’s time for us to start bending the rules.
We will learn how to manipulate the stack manually and observe how careless code or unchecked input can let you overwrite return addresses.
So let’s get move on to Part 3.